Robot Setup
This guide explains how to install the Foxy system image on a microSD card, start the robot, and complete the initial network configuration.
Requirements
Before starting, make sure you have:
- A microSD card compatible with the robot
- A computer with a microSD card reader
- A data-capable micro-USB cable
- Access to a Wi-Fi network
- Permission to install software on your computer
WARNING
Flashing the Foxy image will erase all existing data on the selected microSD card. Verify that you have selected the correct storage device before starting the flash operation.
Flash the Foxy Image
Install balenaEtcher
Download and install balenaEtcher.
balenaEtcher is used to write the Foxy system image to the microSD card.
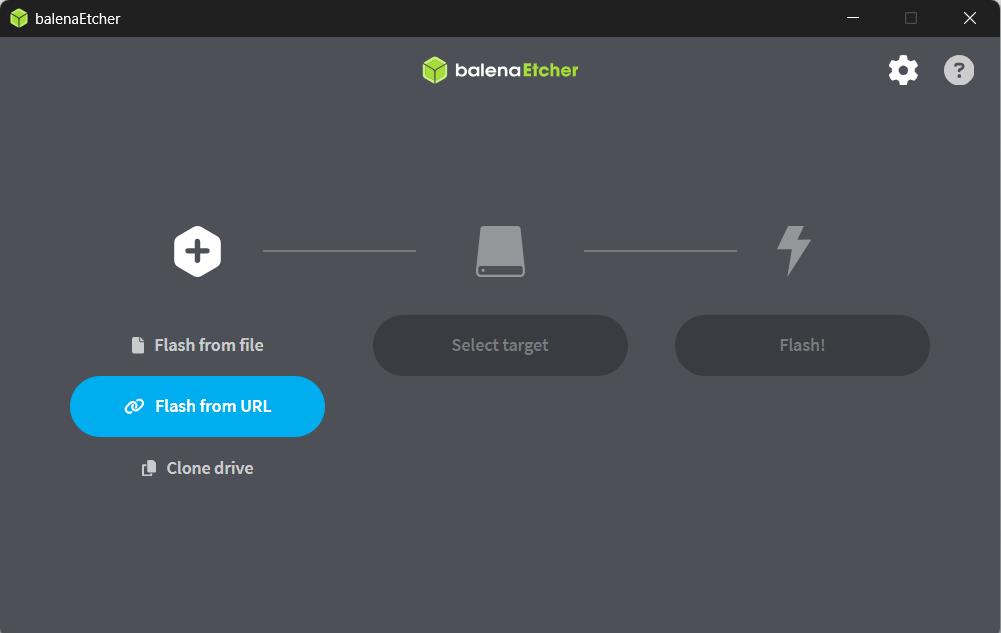
After the installation is complete, open balenaEtcher.
Select the Foxy image
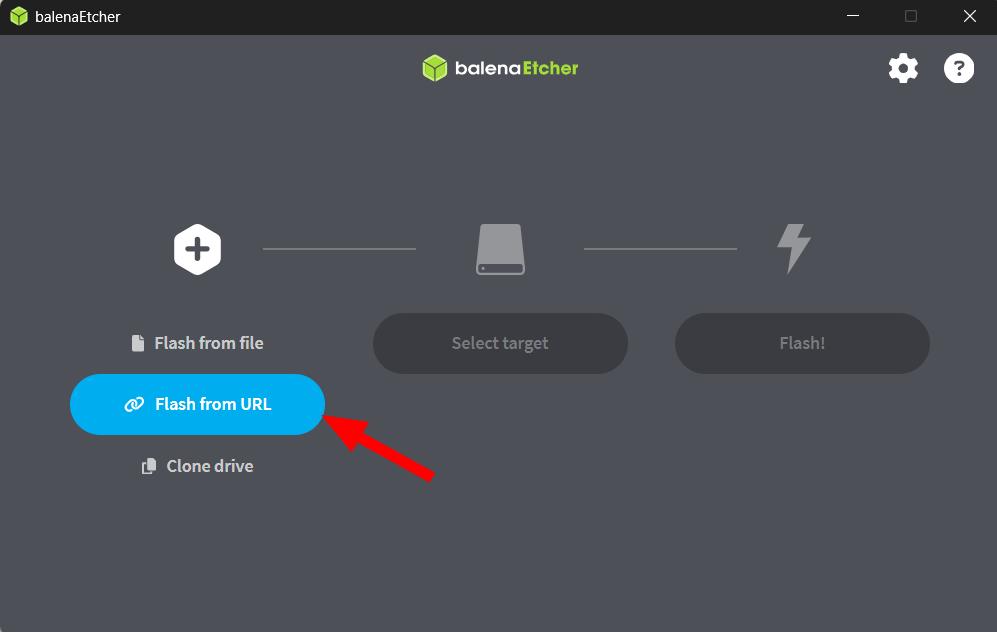
In balenaEtcher, select Flash from URL.
Paste the following image URL:
https://hochschule-rhein-waal.sciebo.de/public.php/dav/files/drB7RpdDq9C7edCConfirm the URL and wait while balenaEtcher loads the image.
Insert the microSD card
Insert the microSD card into your computer.
Use a suitable microSD card adapter or external card reader when required.
Wait until the operating system detects the card before continuing.
Troubleshooting
The computer does not detect the microSD card
Try the following checks:
- Remove and reinsert the microSD card.
- Check that the card is inserted in the correct orientation.
- Try another USB port.
- Try another card reader or microSD adapter.
- Restart balenaEtcher after inserting the card.
- Check whether the card appears in your operating system's disk-management utility.
The adapter has a lock switch
Some full-size SD card adapters have a physical write-protection switch.
Make sure the switch is in the unlocked position before continuing.
Select the target
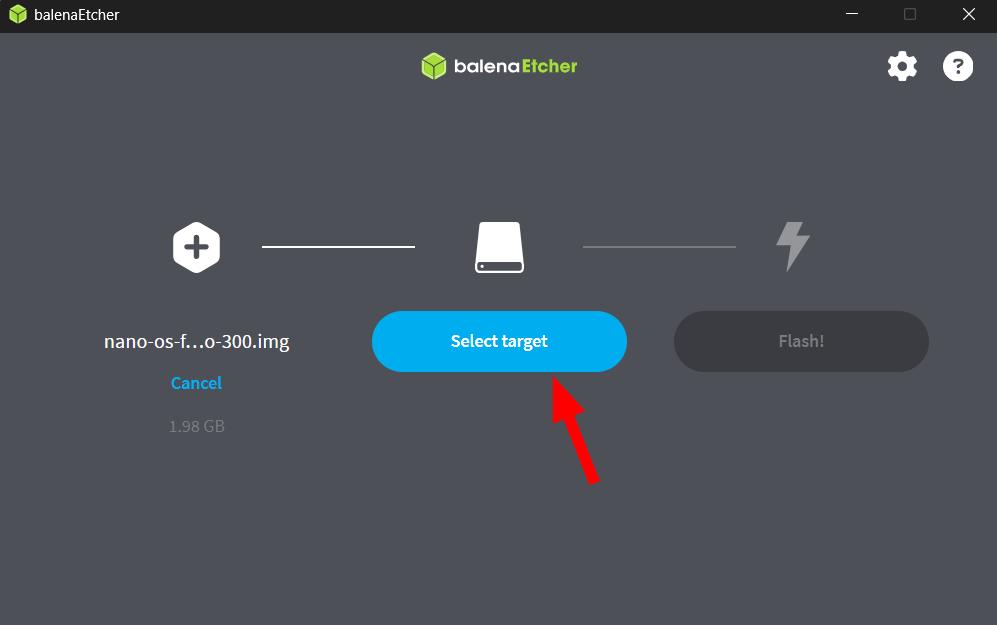
In balenaEtcher, click Select target.
Select the microSD card that will be used in the robot.
Verify the target by checking its:
- Device name
- Storage capacity
- Connection type
CAUTION
Check the device name and storage capacity carefully. Selecting the wrong target may erase another storage device connected to your computer.
Troubleshooting
The microSD card is not listed
Try the following checks:
- Close the target-selection window.
- Remove and reinsert the microSD card.
- Wait for the operating system to detect it.
- Reopen the target-selection window.
- Restart balenaEtcher.
- Try another card reader or USB port.
Multiple storage devices are listed
Do not select a device until you can identify the microSD card safely.
Compare the displayed capacity with the capacity printed on the card. When possible, disconnect unrelated USB storage devices before continuing.
Flash the microSD card
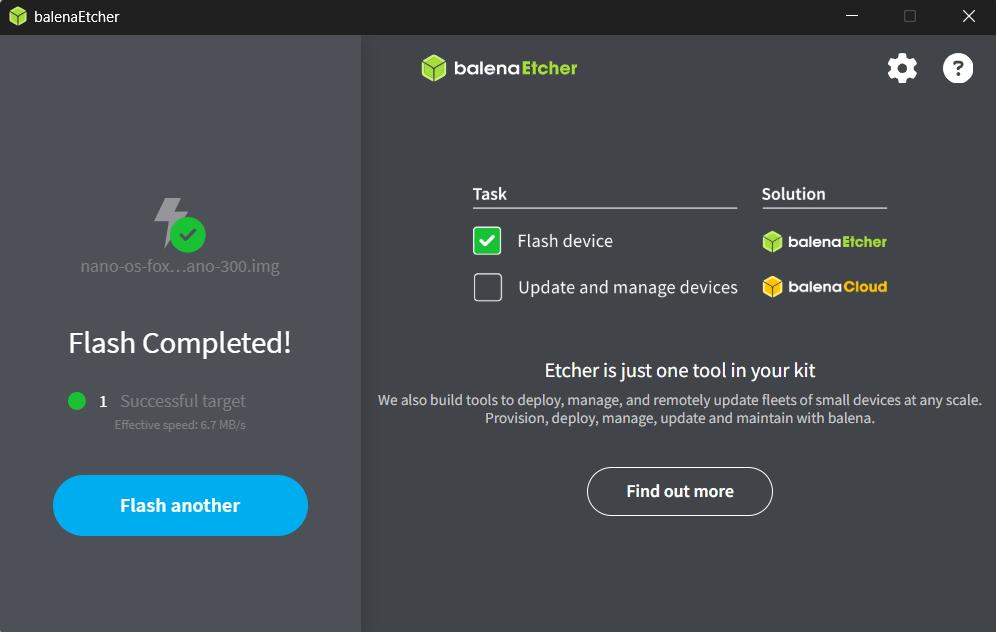
Click Flash to begin writing the Foxy image to the microSD card.
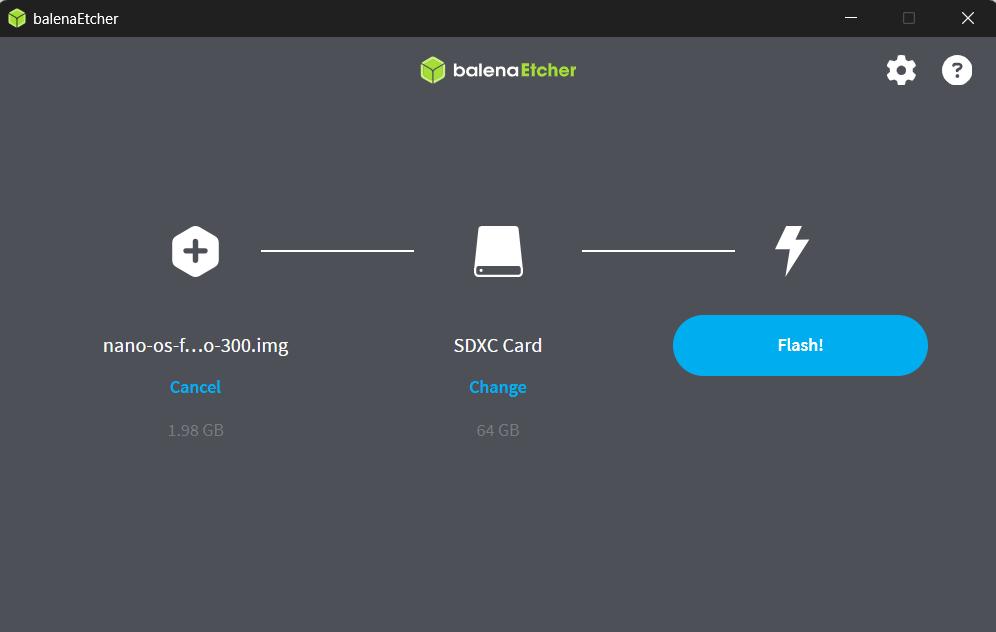
balenaEtcher normally performs two operations:
- Write the image to the microSD card.
- Verify that the image was written correctly.
Do not remove the microSD card or disconnect the card reader while either operation is running.
Wait until balenaEtcher confirms that the flash operation completed successfully.
Troubleshooting
The flash operation does not start
Check that:
- The correct target is selected.
- The microSD card is not write-protected.
- balenaEtcher has the permissions requested by your operating system.
- There is enough free storage space on your computer for temporary files.
The flash operation fails
Try the following actions in order:
- Remove and reinsert the microSD card.
- Restart balenaEtcher.
- Load the Foxy image again.
- Try another USB port or card reader.
- Try another microSD card.
Verification fails
A verification failure indicates that the data read from the microSD card does not match the image that was written.
Do not use the card in the robot yet. Flash it again.
If verification fails repeatedly, replace the microSD card or card reader.
The operation appears to be stuck
Large images can take several minutes to write and verify.
Before interrupting the process, check whether:
- The progress indicator is still changing.
- The card reader has an activity light.
- Your computer is still responsive.
- The microSD card or adapter was accidentally disconnected.
Remove the microSD card
After balenaEtcher reports a successful flash, eject the microSD card using your operating system.
Wait until the operating system confirms that the card can be removed safely, then remove it from the computer.
IMPORTANT
Do not remove the card while it is still being written, verified, or used by another application.
Troubleshooting
The card cannot be ejected
Close applications that may still be accessing the card, including:
- balenaEtcher
- File Explorer or Finder windows
- Disk-management utilities
- Terminal sessions using the card's mounted directory
Try ejecting the card again.
The operating system shows several new partitions
This is expected after flashing the Foxy system image.
Do not format or modify the new partitions, even if your operating system reports that some of them cannot be read.
Insert the microSD card into the robot
Make sure the robot is not powered.
Locate the robot's microSD card slot and check the required card orientation.
Insert the flashed microSD card gently until it is seated correctly.
Do not force the card into the slot.
Troubleshooting
The microSD card does not fit
Stop applying pressure and check:
- The card orientation
- Whether the correct slot is being used
- Whether another card is already inserted
- Whether the card or slot is visibly damaged
The card should enter the slot without significant force.
The card does not remain in the slot
Some card slots use a push-to-lock mechanism.
Insert the card gently until you feel or hear it click into place.
Power on the robot
Press the battery button on the side of the robot to power it on.
The side battery button is the robot's power-on control.
IMPORTANT
The button on top of the robot is a user-programmable button. It is not the power button.
NOTE
The battery button powers the robot on, but it does not perform a software shutdown. Shut down the operating system correctly before switching off or disconnecting the battery whenever possible.
Troubleshooting
The robot does not power on
Check that:
- The battery is connected correctly.
- The battery has sufficient charge.
- The flashed microSD card is fully inserted.
- You pressed the battery button on the side of the robot.
- You did not press the user-programmable button on top.
The robot powers on but does not start correctly
The first startup may take longer than later startups.
Wait several minutes before restarting the robot.
If the robot still does not start:
- Perform a proper shutdown when possible.
- Switch off or disconnect the battery.
- Remove and reinsert the microSD card.
- Power the robot on again.
- Reflash the microSD card if the problem continues.
Post-Installation Setup
The robot uses the following hostname by default:
robotChanging the hostname is recommended, especially when multiple robots are used on the same network. A unique hostname makes each robot easier to identify and access.
Example hostnames include:
foxy-01
foxy-02
foxy-lab-a
Prepare the robot
Make sure that:
- The flashed microSD card is installed.
- The robot is powered on.
- The robot has completed its initial startup.
The first startup may take several minutes.
Troubleshooting
The robot is still starting
Wait several minutes after powering it on before connecting to the setup utility.
Check the robot's status indicators, if available, for signs that the system is still starting.
The robot repeatedly restarts
Check that:
- The battery has sufficient charge.
- The microSD card is inserted correctly.
- The flash operation completed successfully.
- The microSD card passed balenaEtcher's verification step.
If necessary, reflash the microSD card.
Connect the robot to your computer
Connect a data-capable micro-USB cable to the robot's micro-USB port.
Connect the other end of the cable to a USB port on your computer.
TIP
Some micro-USB cables provide power only and cannot transfer data. Use another cable if the setup tool cannot detect the robot.
Troubleshooting
The computer does not detect the robot
Try the following checks:
- Confirm that the robot is powered on.
- Disconnect and reconnect the micro-USB cable.
- Try another USB port.
- Try another micro-USB cable.
- Confirm that the cable supports data transfer.
- Avoid using an unpowered USB hub.
- Close applications that may already be using the USB connection.
How to identify a power-only cable
A power-only cable may charge or power a device but will not create a USB data connection.
When uncertain, use a cable that is known to support file transfer with another device.
Open Foxy Web Setup
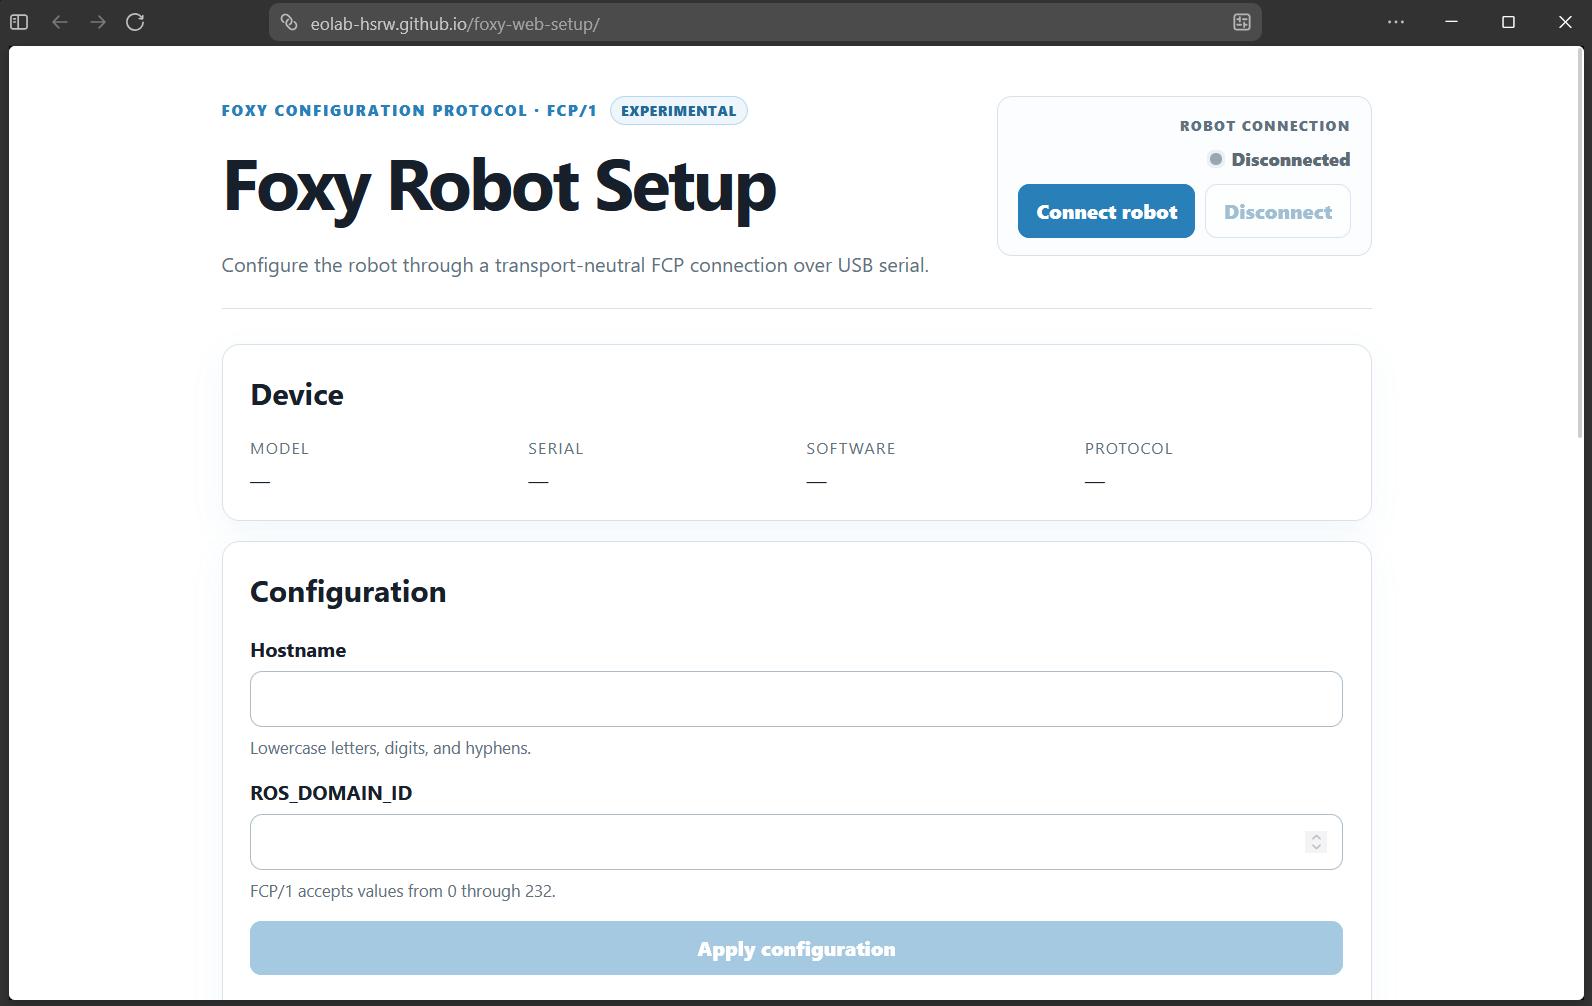
Open the Foxy Web Setup utility in a supported web browser.
Follow the browser prompts to allow the website to connect to the robot.
Troubleshooting
The browser does not show the robot
Check that:
- The robot is powered on.
- The micro-USB cable supports data transfer.
- The cable is connected securely at both ends.
- No other browser tab or application is using the robot's USB connection.
Then reload the Foxy Web Setup page and try again.
The browser asks for device permission
Select the Foxy robot from the device list and approve the connection.
The website cannot communicate with the robot until this permission is granted.
No device-selection dialog appears
Try the following:
- Reload the page.
- Disconnect and reconnect the USB cable.
- Open the setup utility in a supported browser.
- Close other applications that may be using the USB device.
- Restart the browser.
Configure the hostname
Enter a unique hostname for the robot.
Use a short, descriptive name containing:
- Lowercase letters
- Numbers
- Hyphens
Recommended examples:
foxy-01
foxy-02
foxy-navigation
Avoid spaces, uppercase letters, underscores, and other special characters.
Troubleshooting
The hostname is rejected
Check that the hostname:
- Contains only lowercase letters, numbers, and hyphens.
- Does not contain spaces.
- Does not begin or end with a hyphen.
- Is not already used by another robot on the network.
For example, use:
foxy-01Instead of:
Foxy Robot 01The wrong hostname was entered
Correct the hostname before applying the configuration.
If the configuration has already been applied, reconnect to Foxy Web Setup and update it again.
Configure the Wi-Fi connection
Select the Wi-Fi network that the robot should use.
Enter the network credentials and apply the configuration.
Before continuing, verify that:
- The network name is correct.
- The password is correct.
- The network is accessible from the robot's location.
- The network allows new devices to connect.
Troubleshooting
The Wi-Fi network is not listed
Try the following checks:
- Move the robot closer to the wireless access point.
- Refresh the available network list.
- Confirm that the network is currently active.
- Check whether the network name is hidden.
- Verify that the robot supports the network's frequency and security configuration.
The robot does not connect to Wi-Fi
Check that:
- The Wi-Fi password was entered correctly.
- The correct network was selected.
- The robot is within range of the access point.
- The network allows new devices.
- A captive portal or browser-based login is not required.
- The configuration was saved before rebooting.
Reopen Foxy Web Setup and apply the Wi-Fi configuration again when necessary.
The network requires institutional credentials
Some university or enterprise networks require additional authentication, certificates, or device registration.
Ask the network administrator whether the robot can connect directly or whether a dedicated network must be used.
Reboot the robot
Use the reboot option in Foxy Web Setup to restart the robot.
The hostname and Wi-Fi configuration are applied after the robot restarts.
Wait for the robot to complete the reboot before disconnecting the micro-USB cable or attempting to access it over the network.
CAUTION
Do not use the battery button as a normal software shutdown control. Use the reboot or shutdown option provided by the system whenever possible.
Troubleshooting
The reboot command does not respond
Wait briefly and check whether the robot has already started rebooting.
If it remains unresponsive:
- Reload Foxy Web Setup.
- Reconnect to the robot.
- Try the reboot command again.
- Use a proper software shutdown option if one is available.
Only interrupt battery power as a last resort.
The robot does not reconnect after rebooting
The reboot may take several minutes.
Check that:
- The robot remains powered.
- The Wi-Fi configuration is correct.
- The robot is within range of the access point.
- Your computer is connected to the same network.
- The configured hostname is correct.
Reconnect the micro-USB cable and open Foxy Web Setup again if the robot remains unavailable.